


In a world of selfies and Instagram stories, we’ve transitioned to taking photos on our phones instead of traditional cameras. And why not? It’s much more convenient, and most phones have incredibly high-powered cameras. But if you use these photos to showcase your completed projects, you want them to be realistic (no crazy filters) representations of the product in the home. Every home is different, and you may run into dark spaces or awkwardly shaped ones, but not to fear, we’ve collected some tips to take your photos to the next level.

Always wipe off the camera lens on your phone before you shoot.
If you’re like us, your phone is an extension of your hand. It’s in and out of your pocket/bag, set down on every surface, and exposed to every element imaginable. A quick (and gentle) rub down with a soft cloth will ensure clarity in your photos.
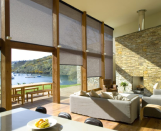
Shoot during the day when you can use natural light.
When possible, utilise the natural light from windows on adjacent or adjoining walls and turn off artificial lights. Natural light will better represent the room and the product’s colour.
Edit your photos.
We recommend using photo editing apps to straighten and crop if needed. To ensure your product is the focal point, crop out any distractions. Make minor adjustments to the exposure and contrast when taking pictures of a room. A quick contrast adjustment will lighten up a photo without losing depth.
You’ll see in the example below the adjustments we made to the photo are small yet make a big difference.

Use a tripod.
We recommend a tripod if you want to use photographs in a more commercial space. They are portable and easy to set up, resulting in steady and level photos that showcase straight lines. It seems strange, but a slightly off-kilter image may look like the shutters are on a slant when they are straight.
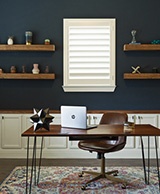
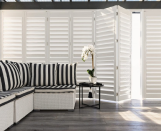
Window products look best when photographed from the front or at a slight angle.
Set up your tripod and take photos of the shutter or shade, completely closed, partly open, and completely open. Often the partially open photos best showcase the product and allow the perfect amount of light to shine through, but being able to showcase all functionality options of the product can be a beneficial selling tool!
Style the shot.
Don’t be afraid to ask the customer if you can use some of their existing home decors or move small furniture out of your shot. Remove all personal photos and incorporate home decor and items such as books, plants, coffee mugs, plush pillows etc.